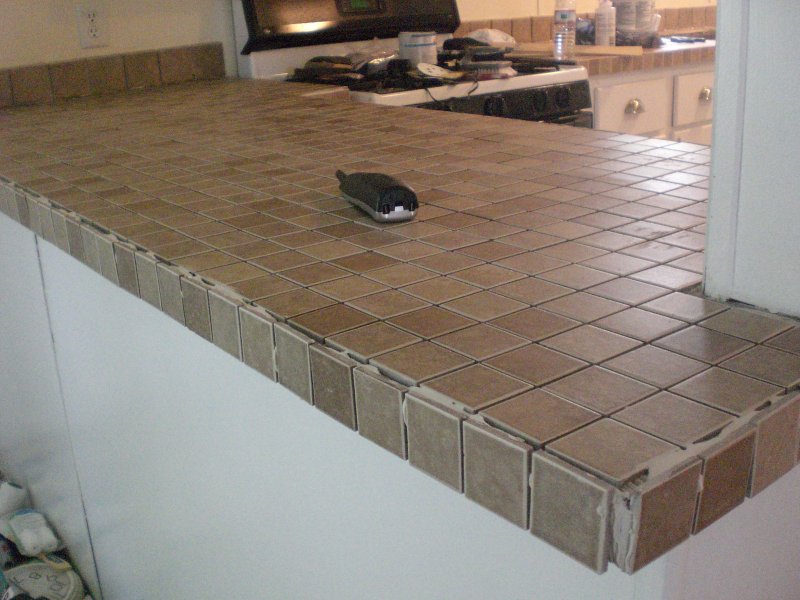
 Since I’d run out of mastic before placing the small tiles on the edges of the peninsula or adding the backsplash, that was the first order of business when I returned to the trailer. It didn’t take long to finish placing the tiles along the front edge and to set the backsplash along the short area at the wall end of the peninsula. It was so exciting to see everything coming together so beautifully. I decided to mix up the grout and do the other counters while the peninsula was drying, so I pulled out all my grouting tools and read the directions on the 25-pound bag of grout mix. Grout is extremely caustic and can harm eyes, skin, and lungs, so I had purchased heavy-duty rubber gloves just for grouting, and I carried the grout out to the front deck to mix so the grout dust wouldn’t be in the house. I also tied an old shirt over my mouth and nose to avoid breathing the dust. In the photo below, you see my grout bucket, grout float, rubber gloves, clean-up sponge, and cheesecloth (for removing the haze afterwards).

After adding the correct amount of water, I began mixing the grout with a large paint stick. Grout has to be stirred for five minutes, then allowed to rest for ten minutes, then stirred again before spreading. I found out which muscles are out of shape about a minute into stirring the heavy grout! 25 pounds of grout takes about 1/3rd of a 5-gallon bucket, and it’s heavy! I set the timer to allow the grout to rest for ten minutes, then gave the grout one last stir when it beeped and began using the float to spread the grout over the tiles on the small counter next to the fridge. There was no way to get a picture, since I couldn’t hold the camera with grout all over my gloves, and I couldn’t take off the gloves with all the grout around!
Let me just tell you that I had forgotten how extremely messy grout is. The last time I grouted was when I helped my mom tile a bathroom over twenty years ago. In my hazy memory, that was a totally clean and easy job. Ha! If I had known how messy grouting was going to be, I’d have waited to redo the kitchen floors. Failing that, I’d have been smart enough to place drop cloths on the floor first! As it was, I made quite a big mess that I had to clean up quickly before the grout had a chance to harden onto the floor or cabinet fronts! Pushing grout into the grooves with a float isn’t at all difficult if you’ve gotten the grout to the right consistency. It just kind of seeps down as you gently pull the float over the surface of the tile. Then I followed this 20 minutes later with a damp sponge to make everything neat and smooth. I had the small counter grouted in about ten minutes and was ready to move on to the sink countertop:

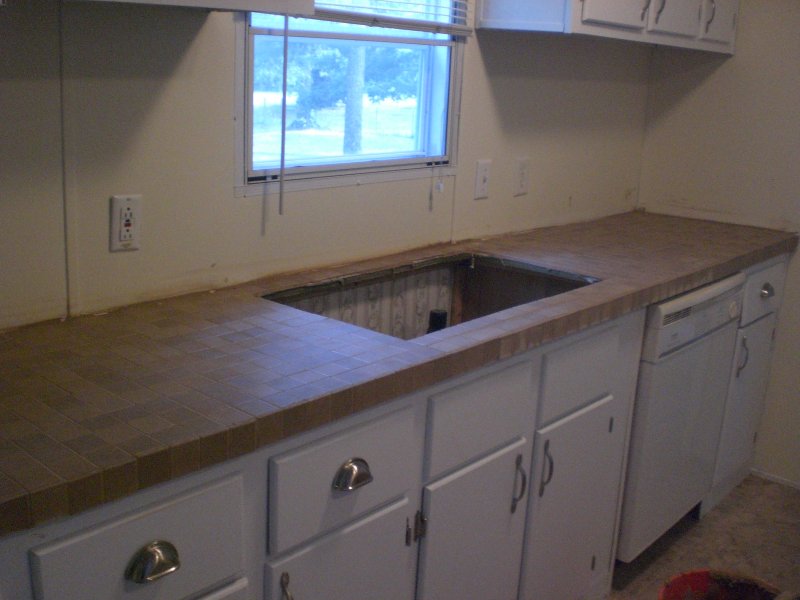
In this picture you can see the haze forming as the grout dries. This is normal. You wipe the haze off a couple of hours later, once the grout has had a chance to set in the spaces between the tiles. If you’ve been paying attention, you may wonder why there’s no backsplash on this countertop. After I’d placed the backsplash on the peninsula, I stepped back and had second thoughts. It would probably be easier to grout the countertop first, then go back and set the backsplash and grout it. That way I could also be sure that I’d filled in the crack underneath the backsplash between the tiles and the kitchen wall. So I ended up creating yet another step for myself. If I had it to do over again, I’d just go ahead and place the backsplash and do all the grouting at once!
 I moved next to the long sink counter and grouted it. This went pretty quickly as well, though I had to stop several times to clean up grout I’d dropped down the cabinet fronts or let dribble on the floor. Messy, messy, messy. But I was absolutely thrilled at the beautiful appearance of my grouted countertops! Everything was looking gorgeous–even better than I’d hoped.
But here’s where I must confess to yet another rookie mistake. I’d come out to the trailer later in the day, thinking it wouldn’t take very much time to finish up what I’d started. So I took a leisurely lunch with our next-door neighbors after laying the last of the peninsula tile, chatting for about an hour before heading back over to the kitchen to do the grouting. By the time I had finished mixing the grout, grouting the first counter, and cleaning up the colossal mess from that area of the kitchen, it was already 3:30 pm. I had to head home by 4:30! Even though the sink counter grouting went fairly quickly, it was 4:15 when I was cleaning up the mess from it, and I knew there was no way I’d get the peninsula grouted and cleaned. My children were playing next door, so I’d have to clean up, pack up, pick up the kids, and head home–all within fifteen minutes. I inwardly berated myself for foolishly thinking I could get so much done in so little time. Worst of all, I had to dump the last third of my grout out, since it would harden in the bucket while I was gone. Rats. Another half day added to this project unnecessarily. Thankfully, my neighbor was willing to run over later that evening and wipe the haze off the grouted counters for me, since that didn’t need to sit for so many days!
I headed home, mentally going over my calendar to figure out when I could get back and finish the grouting job. We were already packing for our move at that point, and I had less than a week left before we’d planned to load up and vacate the old place. So I decided I’d just have to take a day off packing and run back over to the trailer to finish the grout and do the backsplash. Four days later, I did just that. I stopped at Lowe’s to pick up more grout on the way, but I couldn’t find the exact same color. I was sure I’d bought “Sandstone,” but Lowe’s only had one called “Sand.” I went ahead and bought a 7-pound bag and another cheesecloth for final clean-up. When I arrived at the trailer, I saw the original paper bag for the first batch of grout lying on the deck and had an “Uh-oh” moment. By now, I’m sure you’ve lost count of my rookie mistakes, but let’s trot this one out as yet another word to the wise: Remember where you shopped! I hadn’t gotten the grout at Lowe’s at all. If you read Part One, you know that I deliberately got the grout at Home Depot, since Lowe’s didn’t have the color I wanted!
Feeling sheepish, I trekked the 12 miles to Home Depot and picked up the Sandstone grout. With that in hand, I was ready to get back to work and not waste any more time. I followed the mixing directions as before, but this grout came out clumpy and sandy in texture–not at all like the first batch. I re-read the instructions, wondering what I’d done wrong, but I’d definitely added the right amount of water. So I wondered if I’d added too much water to the first batch. A glance at the first bag nixed that idea, but I decided to use the grout as it was anyway. It was like trying to force play dough into the spaces between the tiles! So I disobeyed the instructions and added more water. Bingo! Worked like a charm. I quickly finished grouting the peninsula and its backsplash, then grabbed my mastic and finished placing the backsplash tiles on the other two counter sections:

Above is the fridge counter, with some spare tiles lying on the front. Below is a close-up of the backsplash on the sink countertop:

 Now we come to my final rookie mistake. When I’d bought the second batch of grout, I’d only counted the square footage of the peninsula and its edges. I hadn’t thought to include the backsplash for the other countertops. So, yes, I ran out of grout and couldn’t finish the other two backsplash areas! There wasn’t time for another trip to Home Depot. I had to get back home. I knew I wouldn’t have time to get the grouting done before our move, so I figured I’d just have to do it after we moved in. I did manage to get the grout sealed before we started using the kitchen. Here you see the handy-dandy sealant dispenser with its little wheel that is sized to go between the tiles and roll on the sealant. Below is a picture of the sealant drying on the grout. You can wipe off any excess as you roll it on. Sealant prevents your grout from staining as you use your countertops, so it’s definitely a step you don’t want to omit.

Now that we’ve moved in, I am loving my tiled countertops. I can place hot pots and pans directly on the counter, and I love the color. It looks fantastic with our old curtains and furnishings. So, without further ado, here’s the finished kitchen!

Our small round table fits nicely into the center of the room with two chairs. I’ve got a spare chair over by the pantry. A toile valance goes with the toile slipcovers on the chairs, and the blue china on those end shelves of the peninsula help pull everything together for our blue and white color scheme.

Here’s a closer view of the sink counter with our new sink installed. I love my sink!

And here’s a nice close-up of the tile next to the stove.
This was a project well worth the time and effort–and the silly mistakes! If you learn from my errors, you could easily cut this down to a two-day job for a similarly sized kitchen. Best of all, you can save serious money by doing this project yourself. Here’s a rundown of costs for several countertop upgrades, beginning with most expensive:
- Granite – The average cost for granite is $55 per square foot. That would obviously have been overkill for a trailer like ours, but if we’d gone that route, it would have cost us $2,640. Stainless steel would have come in even higher at $3,360.
- Solid surface (like Corian) – $1,920
- Poured cement or wood (butcher block) – $1,440
- New laminate/formica – $720
So, what did we pay when all was said and done? Here’s the breakdown:
- Countertop mosaic tile: $94.56
- Backsplash tiles (the splurge): $82.80
- Tile spacers: $2.97
- Mastic: $16.92
- Grout float, sponge, cheesecloth, tile sealant and applicator: $58.22
- Grout: $31.82
- GRAND TOTAL: $287.29
That’s almost two-thirds less than it would have cost to replace the laminate, and it’s way, way below any other replacement options. You could bring the price even lower if you eliminated the backsplash tiles, which were definitely a splurge, as they cost nearly as much per tile as the 12×12″ mosaic sections! If I’d left those out, along with the extra mastic and grout needed for them, that would have dropped the full price to $180.67. Amazing, isn’t it, what a little elbow grease will do?
Looking back on this project, I’d say it is something I definitely wouldn’t want to do after moving into a place. Having the time to do it before a move is really wonderful, so if you are able to, do it that way! I can’t imagine the hassle of trying to live for several days without the use of our kitchen while re-doing countertops. But it certainly could be done, so don’t let me discourage you! Just be prepared for the time, effort, and mess. All three are absolutely worth the end results! Below are photos of the before and after–what a difference!

 Amanda Livenwell is the pen name of a stay-at-home mom who shares the adventure of living large on one income in, yes, a double-wide trailer! Join our family as we say goodbye to suburbia, trim down, and start saving to build our own home. We're going to talk about doing it yourself, living beautifully on less, making do or doing without, and counting it all joy in the process. We'll cover prep-work and painting, refacing kitchen cabinets, flooring on the cheap, tiling over laminate, upholstering furniture, and just rolling up our sleeves in general. If you love home improvement, this is the place for you. Let's get cracking!


