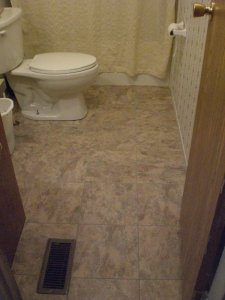
 One Friday afternoon with the house freshly cleaned and the children watching a movie, I decided to tackle their bathroom floor. It had the same white linoleum that was in the kitchen, and with lots of muddy feet and little bodies, this floor was never clean for long! I had plenty of tile left over from the kitchen floor re-do, since I never ended up tiling into the large utility closet. I’m glad now that I didn’t, since reflooring the bathroom was a much better investment of the tile and the time! At left you see the bathroom before. I’ve removed the floor vent cover, and the linoleum has been mopped and stripped to remove any waxing remnants. You can see the vinyl sticky tiles waiting for me.
I debated on where to start tiling in this room, since it is so small. It seemed silly to mark the exact center and begin from there, so I chose instead to start behind the door (the lower right-hand corner in the photo above). This proved to be a very good choice, as I ended up not having to cut so many tiles to get around the air vent hole.
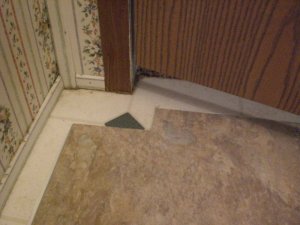
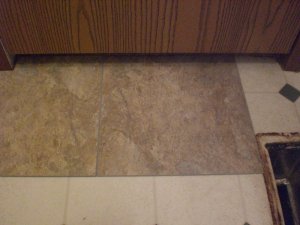
 Here you see the first tile with a notch cut out to go around the corner where the door’s threshhold met the hallway’s carpet. As in the kitchen, I laid the tile down, fitting carefully, then used an old rolling pin to firmly adhere the sticky backing to the floor. I followed up with the second tile, making sure its left edge matched exactly to the first tile and its upper edge butted up against the hallway carpet. Below are the first two tiles in place. See how the second tile comes exactly to the edge of the air vent? I was so happy about that little bit of serendipity. (I confess I didn’t measure–I just eyeballed it and guessed; I’d recommend measuring if you’re having a first go at this sticky tile thing! Measuring in the large kitchen saved us a lot of grief.)
With these tiles in place, I quickly moved on, since I could just place all the tiles along the left-hand wall and match another row next to them before I had to cut around either the vent hole or the toilet. Cutting around the vent hole wasn’t very hard, since I only had to cut two tiles, and both of those tiles went up against the bath cabinet. The only tricky tile was the one that had to go around the door jamb (which you can see in the upper right-hand corner of the photo above). But after all my practice in the kitchen, I just sailed on through with my handy-dandy utility scissors.
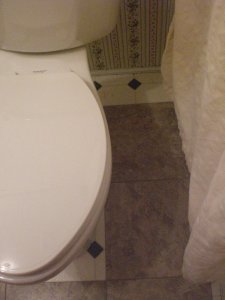
The part of the bathroom floor re-do that took the longest was going around the toilet. Here you see the last bit of tiling yet to be done (and the tiling that required all the cutting for a perfect fit):
I should have been a good girl and made pattern pieces out of cardboard or paper for the curved base of the toilet, but I was in a hurry and just eyeballed and hand-cut a tile to go around the front of the toilet. I was tickled pink when it was a perfect fit and prematurely patted myself on the back:
I figured that, having eyeballed the first tile so easily, it would also be a piece of cake to eyeball the final tile, but the final one included not only the curved back edge of the toilet but the metal pipe running into the floor and the metal ring around it:
I sailed blithely into cutting the last tile anyway, doing my best to accommodate the little curve at the corner. That proved a bit more difficult than I’d initially thought. When I laid the tile down for a test, I saw that I’d cut too little away from the corner where the small ring sits and too much away from the curve to go around the toilet. Blah. I didn’t want to waste an entire tile, so instead of cutting a new one, I just picked up the scrap that came from cutting out the larger curve and cut a piece from it to fill in the half-moon area of linoleum that still showed. When I stepped back a couple of feet, I couldn’t even see the “patch,” and I was delighted to have the entire bathroom floor redone in under 45 minutes! The new floor is very nice to look at and much easier to keep clean. Total cost for this redo (at 44 cents per sticky tile)? $11! Can’t be beat. Well worth the elbow grease! Next bathroom project: painting over the vinyl wallboard’s “wallpaper” to give the bathroom a more updated look. Hurrah!


 Amanda Livenwell is the pen name of a stay-at-home mom who shares the adventure of living large on one income in, yes, a double-wide trailer! Join our family as we say goodbye to suburbia, trim down, and start saving to build our own home. We're going to talk about doing it yourself, living beautifully on less, making do or doing without, and counting it all joy in the process. We'll cover prep-work and painting, refacing kitchen cabinets, flooring on the cheap, tiling over laminate, upholstering furniture, and just rolling up our sleeves in general. If you love home improvement, this is the place for you. Let's get cracking!
